“Design used to be the seasoning you’d sprinkle on for taste. Now it’s the flour you need at the start of the recipe.’’
— John Maeda, Designer and Technologist
Contact us
Please tell us a bit about your project idea and we’ll get back to you as soon as possible.
Thank you! Your submission has been received!
Oops! Something went wrong while submitting the form.
Privacy Policy
This Privacy policy was published on March 1st, 2020.
GDPR compliance
At UX GIRL we are committed to protect and respect your privacy in compliance with EU - General Data Protection Regulation (GDPR) 2016/679, dated April 27th, 2016. This privacy statement explains when and why we collect personal information, how we use it, the conditions under which we may disclose it to others and how we keep it secure. This Privacy Policy applies to the use of our services, products and our sales, but also marketing and client contract fulfilment activities. It also applies to individuals seeking a job at UX GIRL.
About UX GIRL
UX GIRL is a design studio firm that specialises in research, strategy and design and offers clients software design services. Our company is headquartered in Warsaw, Poland and you can get in touch with us by writing to hello@uxgirl.com.
When we collect personal data about you
When you interact with us in person – through correspondence, by phone, by social media, or through our uxgirl.com (“Site”).
When we get personal information from other legitimate sources, such as third-party data aggregators, UX GIRL marketing partners, public sources or social networks. We only use this data if you have given your consent to them to share your personal data with others.
We may collect personal data if it is considered to be of legitimate interest and if this interest is not overridden by your privacy interests. We make sure an assessment is made, with an established mutual interest between you and UX GIRL.
When you are using our products.
Why we collect and use personal data
We collect and use personal data mainly to perform direct sales, direct marketing, and customer service. We also collect data about partners and persons seeking a job or working in our company. We may use your information for the following purposes:
Send you marketing communications which you have requested. These may include information about our services, products, events, activities, and promotions of our partners. This communication is subscription based and requires your consent.
Send you information about the services and products that you have purchased from us.
Perform direct sales activities in cases where legitimate and mutual interest is established.
Provide you content and venue details on a webinar or event you signed up for.
Reply to a ‘Contact me’ or other web forms you have completed on our Site (e.g., to download an ebook).
Follow up on incoming requests (client support, emails, chats, or phone calls).
Perform contractual obligations such as invoices, reminders, and similar. The contract may be with UX GIRL directly or with a UX GIRL partner.
Notify you of any disruptions to our services.
Contact you to conduct surveys about your opinion on our services and products.
When we do a business deal or negotiate a business deal, involving sale or transfer of all or a part of our business or assets. These deals can include any merger, financing, acquisition, or bankruptcy transaction or proceeding.
Process a job application.
To comply with laws.
To respond to lawful requests and legal process.
To protect the rights and property of UX GIRL, our agents, customers, and others. Includes enforcing our agreements, policies, and terms of use.
In an emergency. Includes protecting the safety of our employees, our customers, or any person.
Type of personal data collected
We collect your email, full name and company’s name, but in addition, we can also collect phone numbers. We may also collect feedback, comments and questions received from you in service-related communication and activities, such as meetings, phone calls, chats, documents, and emails.
If you apply for a job at UX GIRL, we collect the data you provide during the application process. UX GIRL does not collect or process any particular categories of personal data, such as unique public identifiers or sensitive personal data.
Information we collect automatically
We automatically log information about you and your computer. For example, when visiting uxgirl.com, we log your computer operating system type, browser type, browser language, pages you viewed, how long you spent on a page, access times, internet protocol (IP) address and information about your actions on our Site.
The use of cookies and web beacons
We may log information using "cookies." Cookies are small data files stored on your hard drive by a website. Cookies help us make our Site and your visit better.
We may log information using digital images called web beacons on our Site or in our emails.
This information is used to make our Site work more efficiently, as well as to provide business and marketing information to the owners of the Site, and to gather such personal data as browser type and operating system, referring page, path through site, domain of ISP, etc. for the purposes of understanding how visitors use our Site. Cookies and similar technologies help us tailor our Site to your personal needs, as well as to detect and prevent security threats and abuse. If used alone, cookies and web beacons do not personally identify you.
How long we keep your data
We store personal data for as long as we find it necessary to fulfil the purpose for which the personal data was collected, while also considering our need to answer your queries or resolve possible problems. This helps us to comply with legal requirements under applicable laws, to attend to any legal claims/complaints, and for safeguarding purposes.
This means that we may retain your personal data for a reasonable period after your last interaction with us. When the personal data that we have collected is no longer required, we will delete it securely. We may process data for statistical purposes, but in such cases, data will be anonymised.
Your rights to your personal data
You have the following rights concerning your personal data:
The right to request a copy of your personal data that UX GIRL holds about you.
The right to request that UX GIRL correct your personal data if inaccurate or out of date.
The right to request that your personal data is deleted when it is no longer necessary for UX GIRL to retain such data.
The right to withdraw any consent to personal data processing at any time. For example, your consent to receive digital marketing messages. If you want to withdraw your consent for digital marketing messages, please make use of the link to manage your subscriptions included in our communication.
The right to request that UX GIRL provides you with your personal data.
The right to request a restriction on further data processing, in case there is a dispute about the accuracy or processing of your personal data.
The right to object to the processing of personal data, in case data processing has been based on legitimate interest and/or direct marketing.
Any query about your privacy rights should be sent to hello@uxgirl.com.
Hotjar’s privacy policy
We use Hotjar in order to better understand our users’ needs and to optimize this service and experience. Hotjar is a technology service that helps us better understand our users experience (e.g. how much time they spend on which pages, which links they choose to click, what users do and don’t like, etc.) and this enables us to build and maintain our service with user feedback. Hotjar uses cookies and other technologies to collect data on our users’ behavior and their devices (in particular device's IP address (captured and stored only in anonymized form), device screen size, device type (unique device identifiers), browser information, geographic location (country only), preferred language used to display our website). Hotjar stores this information in a pseudonymized user profile. Neither Hotjar nor we will ever use this information to identify individual users or to match it with further data on an individual user. For further details, please see Hotjar’s privacy policy by clicking on this link.
You can opt-out to the creation of a user profile, Hotjar’s storing of data about your usage of our site and Hotjar’s use of tracking cookies on other websites by following this opt-out link.
Sharethis’s privacy policy
We use Sharethis to enable our users to share our content on social media. Sharethis lets us collects information about the number of shares of our posts. For further details, please see Sharethis’s privacy policy by clicking on this link.
You can opt-out of Sharethis collecting data about you by following this opt-out link.
Changes to this Privacy Policy
UX GIRL reserves the right to amend this privacy policy at any time. The latest version will always be found on our Site. We encourage you to check this page occasionally to ensure that you are happy with any changes.
If we make changes that significantly alter our privacy practices, we will notify you by email or post a notice on our Site before the change takes effect.
Setting up a custom domain is a crucial step to making your Webflow website live and accessible. A custom domain not only strengthens your brand and boosts SEO visibility but also makes it easier for people to find and remember your site.
If you’re new to domains and Webflow, don’t worry-this guide will walk you through the entire process, step by step. Whether you’ve purchased your domain from Google Domains, GoDaddy, or another registrar, this tutorial will show you how to connect it to Webflow quickly and easily.
What You Need Before You Start
A Webflow Site: Ensure your project is ready and you’ve upgraded to a Webflow Site plan.
A Domain Name: Purchase one from a domain registrar like Google Domains or other registrar.
Access to Your Domain Registrar Settings: You’ll need login details to modify your DNS settings.
Step 1: Add Your Domain to Webflow
Log in to your Webflow account and open the project you want to connect.
Go to the Settings tab for your project.
Navigate to the Publishing tab.
In the Production section click Add a custom domain and then Manually add domain.
Type in your domain (e.g., www.yourdomain.com) and click add domain.
Step 2: Update Your DNS Settings
To connect your domain to Webflow, you’ll need to update your DNS records at your domain registrar.
1. Log In to Your Domain Registrar
Access the platform where you purchased your domain (e.g., GoDaddy, Namecheap, Google Domains). Look for an option labeled DNS Settings, Manage DNS, or something similar.
2. Add Webflow DNS Records
In your registrar’s DNS settings, update or add these records:
A Records (Address Records): These map your domain (e.g., yourdomain.com) to an IP address, directing visitors to the correct server hosting your website.
CNAME Record (Canonical Name): This redirects a subdomain (e.g., www.yourdomain.com) to another domain, such as Webflow’s proxy server (proxy-ssl.webflow.com), ensuring traffic routes correctly.
TXT Record (Text Record): This is used to store text information, such as a verification code provided by Webflow, to confirm ownership of your domain.
3. Save Your Changes
Save your DNS settings after adding the above records and click Verify domain. These changes can take some time to propagate (up to 24 hours), though it’s often much faster.
Step 3: Verify and Publish Your Domain
Go back to Webflow’s Publishing settings.
Click Check Status next to your custom domain. This checks whether Webflow recognizes the updated DNS settings.
Make sure you set your “www” version as a default.
Once verified, click Publish and select your custom domain.
Troubleshooting Tips
DNS Not Propagating: DNS updates can take time. Wait a few hours and check again.
Secure Connection (SSL): Enable SSL in Webflow’s Publishing tab to ensure your website loads securely over https://.
Double-Check DNS Entries: Confirm that you’ve entered both the A Records and the CNAME Record correctly in your domian registrar.
You’re All Set!
Your Webflow site is now live on your custom domain. Following these steps ensures your website is accessible and professional-looking, and now your audience can easily find you online.
If you’re looking for more Webflow tips or need expert help with your website, UX GIRL is here to assist. Get in touch, and let’s create something amazing together!
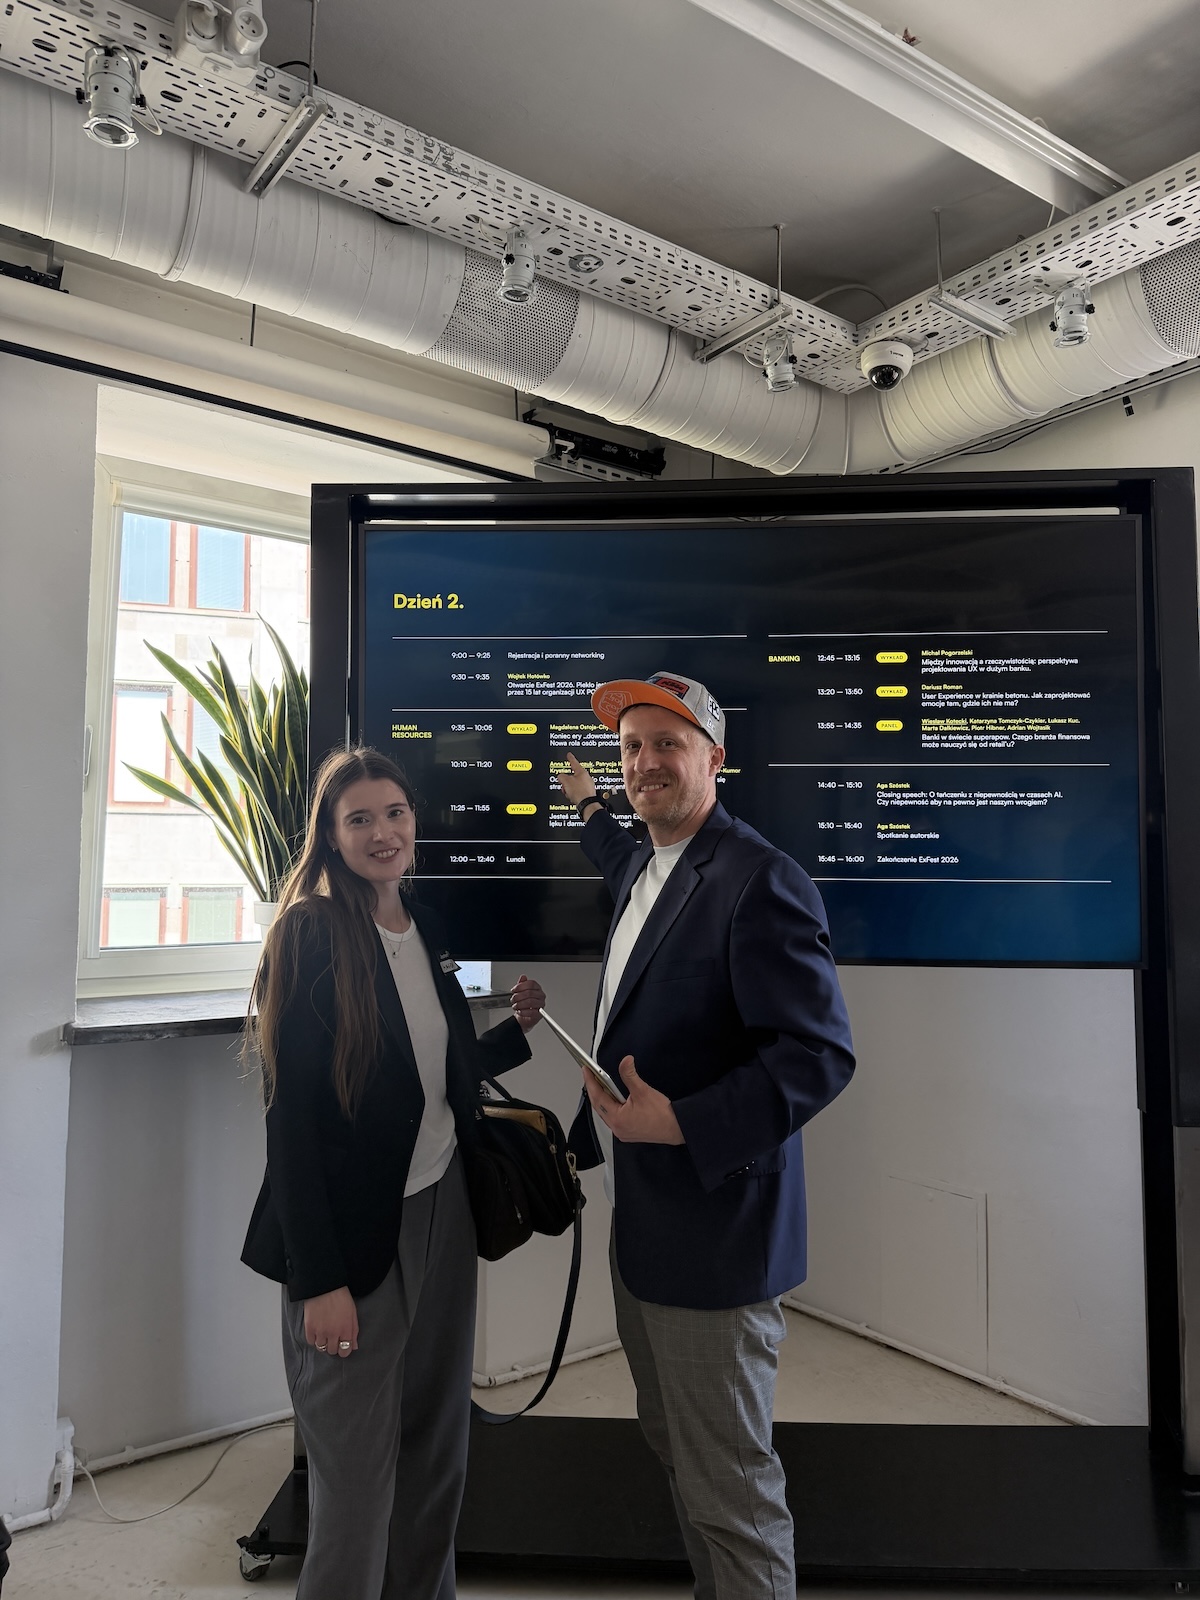
On April 17, 2026, during EXFEST - Experience Festival in Warsaw, Magdalena Ostoja-Chyżyńska, CEO & Founder of UX GIRL, delivered a presentation titled The Era of Enablers: The End of the Delivery Era and the New Role of Product Professionals. Rather than focusing on specific UX methods or design trends, the talk explored a broader transformation that is currently changing the way digital products are built and how product teams operate.
The presentation offered a perspective on how technology has shaped professional roles over the last three decades and why artificial intelligence may be initiating another significant shift in the industry.
From the Era of Webmasters to the Era of Specialists
Magdalena began by taking the audience back to the early years of the internet. During the 1990s and early 2000s, a single webmaster was often responsible for nearly every aspect of building and maintaining a digital product. Design, development, analytics, databases, copywriting and graphics frequently belonged to one role.
As technology evolved and digital products became more sophisticated, organizations responded through specialization. New professions emerged, including UX designers, UI designers, UX writers, frontend and backend developers, testers, product owners and project managers. What was once handled by a single person gradually became distributed across entire teams of specialists.
This evolution brought many benefits. Specialized knowledge enabled companies to build more advanced products, improve quality and create better experiences for users. However, it also introduced new challenges. Teams became larger, processes became more complex and communication between disciplines became increasingly important.
AI as a New Turning Point
According to Magdalena, artificial intelligence represents another major turning point in this story.
For years, the industry moved toward narrower and narrower specializations. Today, AI tools are allowing professionals to cross many of these boundaries once again. Designers can generate interfaces and prototypes faster than ever. Developers can use AI-assisted coding tools. Researchers can process large volumes of information more efficiently. Product teams can analyze data, create reports and explore new ideas with significantly less effort.
This does not mean that expertise is disappearing. Instead, AI acts as a force multiplier that enables individuals to accomplish tasks that previously required multiple specialists or significantly more time. The presentation described AI not as a replacement for human work but as a technology that expands human potential.
What Has AI Actually Changed?
One of the central sections of the presentation focused on four major changes introduced by AI.The first is abundance. AI can generate enormous quantities of content, ideas, designs, code and solutions. For many organizations, the challenge is no longer producing options but selecting the right ones. In a world where almost anyone can create something, the ability to evaluate, prioritize and curate becomes increasingly valuable.
The second change is speed. Tasks that once required days of work can now be completed within hours or even minutes. This acceleration allows teams to spend less time on repetitive execution and more time on strategic thinking.
Third, AI expands capabilities. Professionals are no longer restricted by the traditional boundaries of their role. A designer can better understand technical implementation. A developer can participate more actively in product discussions. A product manager can explore data and research in greater depth. AI makes multidisciplinary work more accessible.
Finally, AI brings teams closer to business. When routine tasks become easier to execute, more attention can be directed toward customer needs, business goals, key metrics and long-term product strategy.
The End of the Delivery Era
A particularly interesting message from the presentation concerned the traditional understanding of productivity in product organizations. For years, many teams were evaluated primarily on their ability to deliver. Success was measured through completed tasks, released features and executed roadmaps. However, when AI reduces the effort required to build, design and analyze, simply delivering outputs becomes less of a competitive advantage.
Instead, organizations increasingly need people who can identify meaningful opportunities, define valuable problems to solve and connect business objectives with user needs. The discussion shifts from “Can we build it?” to “Should we build it?” and “What impact will it create?” This represents a significant change in how product work is understood.
Moving Closer to Business Outcomes
Another important theme of the presentation was the growing relationship between product teams and business strategy. Magdalena highlighted that modern product professionals need to understand not only interfaces and features but also objectives, key results and company priorities. The presentation showed how daily tasks should connect to broader business goals and measurable outcomes rather than existing as isolated activities.
In this context, AI becomes a tool that helps teams move beyond operational work and participate more actively in strategic decision-making. Product, design and technology professionals are expected to understand business problems and contribute directly to solving them.
The Rise of the Enabler
The concept that tied the entire presentation together was the idea of the “Enabler.” An enabler is someone who uses technology, knowledge and collaboration to unlock value for others. Rather than focusing exclusively on one specialization, enablers connect disciplines, facilitate decision-making and help organizations achieve meaningful results.
The future may therefore belong less to narrowly defined specialists and more to professionals capable of combining different perspectives, leveraging AI effectively and translating complexity into business impact.
Final Thoughts
Magdalena Ostoja-Chyżyńska’s presentation offered an optimistic view of the future of product work. While artificial intelligence is undoubtedly changing established ways of working, it is also creating new opportunities for growth and innovation.
The key message was not that specialization is becoming obsolete, but that the role of professionals is evolving. As AI takes over more repetitive and operational activities, people can focus on strategy, creativity, problem-solving and business impact.
The era of simply delivering work may be coming to an end. What emerges in its place is the Era of Enablers — professionals who use technology not only to build products, but to create meaningful value for users, teams and organizations.
In the late 90s, the digital world was ruled by the Webmaster. This single individual was a true generalist, handling everything from graphic design to database configuration and raw coding. As the internet matured, the market demanded more complexity, leading to an era of intense specialization. We built silos, separating the ux designer,ui designer, front end developer, database manager, and data scientist into distinct departments.
While specialization allowed for scale, it also created friction. Today, however, we are witnessing a full-circle evolution. The Era of Enablers (or as I like to call them, Architects of Potential) has arrived, powered by the explosive rise of AI.
Collapsing the Silos
AI is effectively removing the technical barriers that once forced us into narrow boxes. With generative tools handling the "heavy lifting" of syntax and execution, a single builder can once again oversee the entire product lifecycle. This isn't just about efficiency; it's about proximity.
When the person designing the experience is also the one enabling the build, the distance between a concept and a finished product vanishes. More importantly, the distance between the creator and the decision makers disappears.
Why This Matters for Your Career
In this new landscape, being "just" a specialist is a risky strategy. By becoming an "Enabler," you move:
Closer to the Business: You aren't just delivering assets; you are driving KPIs.
From "How" to "Why": Your value shifts from knowing a specific programming language to having deep product intuition and systems thinking.
Toward Strategic Impact: You become a strategic partner to the business, capable of turning ideas into reality at the speed of thought.
The market is no longer looking for cogs in a machine. It is looking for architects who can leverage AI to build the future. The era of the fragmented specialist is fading; the era of the Architect of Potential is here.
Artificial intelligence is no longer a distant promise for design teams-it is already reshaping how designers think, collaborate, and create. This shift was the focus of a talk delivered by Magdalena Ostoja‑Chyżyńska, CEO & Founder of UX GIRL, during Data Science Summit, one of the key events bringing together experts from data, technology, and digital innovation.
In her presentation, “How AI and Enhanced Data Access are Transforming Today’s Design,” Magdalena explored how artificial intelligence is influencing modern design practice-not as a replacement for human creativity, but as a force that is redefining how design teams work with data, insights, and complex business requirements
Design at the Intersection of AI and Data
The talk addressed a challenge many organizations currently face: how to integrate AI into design processes without reducing originality or oversimplifying complex user problems. As Magdalena explained, the growing accessibility of data and AI models has fundamentally changed how designers approach tasks such as briefing, user research, insight synthesis, requirements definition, and asset creation.
Rather than treating AI as a purely visual or generative tool, the presentation positioned it as a broader design accelerator-one that influences decision-making long before the first interface is drawn.
Insights from Real Client Projects
A key strength of the session was its grounding in real business practice. Drawing from ongoing client work at UX GIRL, Magdalena shared observations from testing different AI tools and models across multiple stages of the design process. These experiments focused on understanding where AI genuinely supports creative and analytical work, and where its limitations become visible in real-world conditions.
During the talk, she referenced commonly used tools such as Midjourney, ChatGPT, Claude, and Recraft, explaining how they were evaluated not in isolation, but in combination with different types of data and project constraints. The emphasis was not on novelty, but on effectiveness-how these tools behave when confronted with incomplete data, ambiguous requirements, or complex stakeholder expectations.
Creativity, Control, and the Role of Data
One of the central themes of the presentation was the relationship between AI output and data quality. Magdalena highlighted that AI-driven design outcomes are only as strong as the data and context provided to the models. Enhanced access to data can dramatically improve speed and clarity, but it also increases the responsibility of design teams to curate, interpret, and challenge that data rather than accept AI-generated results at face value.
The session made it clear that AI does not remove the need for designers’ judgment. On the contrary, it amplifies the importance of critical thinking, domain knowledge, and ethical responsibility in design decisions.
Why This Talk Resonated at Data Science Summit
Presenting this topic at a data-focused conference was intentional. The session connected two worlds that often operate separately: design and data science. By showing how AI is already embedded in everyday design workflows, Magdalena demonstrated that design maturity today increasingly depends on data literacy and cross‑disciplinary collaboration.
For many attendees, the talk offered a rare perspective-AI discussed not from a purely technical standpoint, but through the lens of practical design leadership and real client constraints.
Looking Ahead
The presentation reinforced UX GIRL’s position at the intersection of design, data, and emerging technology. Rather than following trends, the studio actively tests and evaluates new tools in live projects, translating experimentation into informed design decisions.
As AI continues to evolve, the questions raised during this session remain highly relevant: how to preserve originality, how to use data responsibly, and how to ensure that technology strengthens-not flattens-the impact of design.
For those interested in how AI is shaping the future of design beyond surface-level automation, the work and insights shared by UX GIRL offer a grounded and experience-driven perspective.

.png)


.svg)


.jpg)


